These values explain what Nature Photography Mastery Academy stands for.
They are the mindset, principles, and approach that I believe can transform you into a nature photography master, and enable you to produce superb images.
A word of warning: There are very few people who are serious enough and tough enough to handle the credo!
If you feel like these values describe who you are, or who you’d like to be, then you are definitely in the right place, and I congratulate you on being one of the select few!
My definition of superb images:
The subject is a good specimen, is in a good position or pose, is sharp, is well-exposed, is shot from a good angle or perspective, and has good lighting. The image has a strong composition, is clean, with no distractions, and conveys the vision of the photographer. The image quality is high and is well processed.
My idea of a master:
The photographer has a deep, complete understanding and effective use of equipment, techniques, and skills, from image conceptualization to the final image output. They are visionary, and achieve their goals by using hard work, patience, persistence, and by being proactive in their approach. They are constantly improving in whatever way they can, have very high standards, and only show their best work.
The Credo Values and Principles:
(For more info, scroll down, or click a tenet)
- Make Nature Photography Mastery your top priority
- Have extremely high standards
- Be extremely detail oriented
- Be disciplined in everything you do
- Take a holistic approach to photography
- Master your gear, techniques, and concepts
- Shoot often, and give it everything you’ve got
- Develop your eye, and mind, for field shooting
- Photograph the subject at their level
- Don’t shoot in harsh light
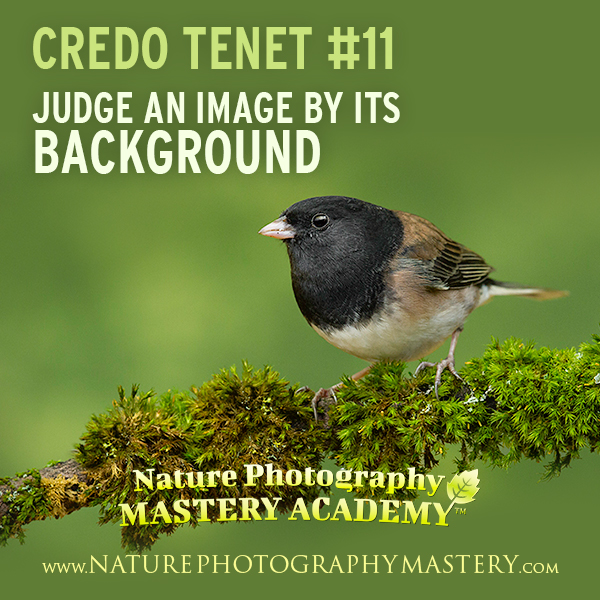
- Judge an image by its background
- Sharpness matters
- Buy top quality equipment
- Don’t take pictures…create images
- Develop patience and perseverance
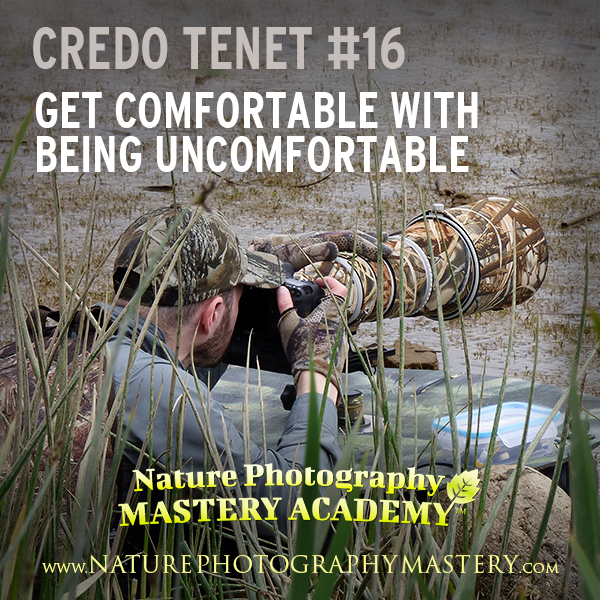
- Get comfortable with being uncomfortable
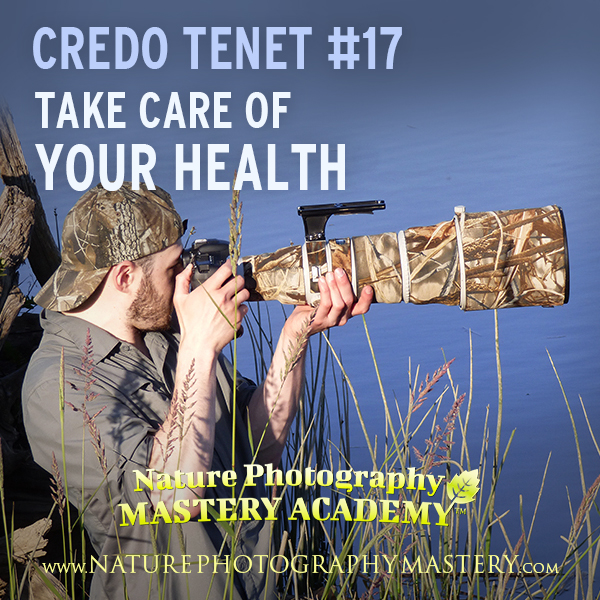
- Take care of your health
- Be ethical when photographing wildlife
- Be respectful of other people
- Have the proper attitude toward post-processing
Videos Coming Soon – Stay Tuned!
1. Make Nature Photography Mastery your top priority
In order to become a masterful nature photographer and create superb, artistic images, it must be your top priority. Nature photography has to be something that you can’t get out of your mind, something you daydream about, something that you get incredibly excited about. You need to eat, breathe, and sleep it.
When you have achieved the correct mindset, you will make sacrifices in your life by cutting out time-wasting activities of little value, so you can spend more time on photography. You will begin saving money for photography equipment and trips. You will find yourself doing research, wishlisting equipment, reading blogs, chatting on forums, and getting obsessed with subjects. You may even start DIY projects to make custom gear.
After you consistently put 110% of yourself into your photography, over a long period of time, you will begin to notice exponential improvements in your work and skills. These improvements will be very rewarding, and will reinforce the process of hard work and effort. It’s not easy, and it’s not fast, but if it was, everybody would do it.

2. Have extremely high standards
You should take pride in excellence, and have confidence and belief in your potential. Don’t set high standards in order to impress other people, or because you feel it is otherwise important – do it because you want to live up to your greatness, because you have integrity with yourself, and because you want to play big. Don’t do it for others, do it for you.
You must never be completely satisfied with your work at this point – it’s healthy to feel good about your work, and proud of what you’ve achieved thus far, but you should always believe you can still improve technically, artistically, and creatively.
Don’t listen to people if they tell you that you work too hard, or that your photos are already good enough. Don’t let people with average standards hold you back. Only you know your true potential and what you are capable of producing. Please note that I’m describing confidence and ambition, not arrogance.
During post-processing, you must ruthlessly cull all images that are not excellent. Regardless of the avenue and method of display, you should only show your very best images that are highly artistic, technically excellent, and represent your full potential at this moment.

3. Be extremely detail oriented
Paying close attention to details, and doing something about them, could be considered “perfectionism.” That term has a negative connotation, and there are some situations where being a perfectionist can be a disadvantage, but in general, it can be a positive thing.
From conceptualizing the image, to planning it, to executing it technically and artistically, there are many little things that can make a big difference. In post-processing, taking care of the minutia can be the difference between a “good” image, and a “masterpiece.”
Similar to the tenet of having high standards, being detail oriented is about taking pride in excellence. You’re not trying to impress anyone, you’re just doing it because you won’t settle for anything less than the best result you are capable of.
There are countless examples of the details you should pay attention to, but some important examples are:
Minor differences in the angle of an animal’s head and slight differences in the direction of its gaze, the position and overlap of an animal’s legs or wings, the quality of an animal’s perch or surroundings, how light and shadow fall on the subject, what distractions are present in the image and background, and whether or not all of the petals on a flower are clean and undamaged.

4. Be disciplined in everything you do
The word “discipline” is sometimes perceived negatively, as something unpleasant or challenging, but being disciplined is not difficult if you have the proper mindset. When you are seriously committed to achieve something, taking the necessary actions is not an option, it’s a requirement. Disciplined actions create positive results, which reinforce the actions, thereby perpetuating the cycle. It’s important to understand that motivation follows action, so you need to get started first, and then you’ll feel better about getting started.
Discipline is present in many forms and areas of photography, including, but not limited to:
- Researching equipment, locations, techniques, and subjects.
- Doing experiments and tests.
- Practicing, and learning from your mistakes.
- Giving 110% effort on everything, every time.
- Having replicable systems, procedures, and habits.
- Always using proper technique, even when you don’t feel like it.
- Properly cleaning, caring for, and putting away all equipment, after every shoot.
- Keeping documents and records from trips, experiments, workflows, research, and so forth
Discipline is the key to consistent progress, exponential improvement, and efficiency.

5. Take a holistic approach to photography
Too often, people focus on just a few aspects of photography, while ignoring the bigger picture. For example, they might put too much emphasis on post-processing, overlook the importance of fieldcraft, do too much research and not enough shooting, skip a comprehensive understanding of the basics and jump into advanced topics, focus on artistry while ignoring technical skills, or any other number of possibilities.
Everything counts, and each thing affects the others. When you focus on all of the areas, it adds up, and you will make dramatic, exponential improvements and progress. It’s not enough to just have nice gear, or just understand the settings, or just go to a good location, or just have nice light, or just be an expert in Photoshop – you need all of them
Another thing that is commonly overlooked is the “purpose” or “why” you are doing nature photography. If you’ve never truly thought about it, you should sit down and do a brainstorm. What got you started in nature photography? What motivates you? What are your short-term goals? What are your long-term goals? What impact can you have on the industry?
If you put time and effort into every aspect of photography, you will have a more comprehensive understanding, and clarity on how you should proceed.

6. Master your gear, techniques, and concepts
It’s the photographer, not the gear, that gets amazing photos.
That is one of the most important things to know about photography.
Although I recommend buying top-quality equipment, I always emphasize the fact that you need to have the knowledge and skill to properly utilize it. Superb equipment won’t get great photos – only a photographer can do that.
Understand all features, functions, switches, and buttons of your gear. Read the manual several times, over a period of time, as you follow along and try things. Work to memorize buttons, menus, and settings, and over time as you practice, try to operate the camera less by looking and more by feeling. Try looking through the viewfinder as you operate the buttons and switches. Condition yourself, through repeated practice, to have muscle memory for operating the camera. The slower you are and the more you fumble, the more shots you’ll miss.
Truly, fully understand exposure, metering, shutter speed, aperture, and all other settings. Know which settings to use for specific shots you are going for. For example, a silky waterfall, a bird in flight, a flash exposure, a near subject, a far subject, and any of millions of other possibilities. Having a weak understanding of these settings will undoubtedly lead to random, incorrect, and wasteful exposure settings.
For example, many people recommend photographing the moon at around f/11. That seems like a poor choice to me, because the moon is so far away that the depth of field at any aperture is essentially infinite. In my mind, a better choice would be to shoot the moon at your widest aperture (usually f/4 on a telephoto lens) or maybe one stop down if your lens is not superbly sharp, otherwise you are just wasting light and negatively affecting your other settings. It’s better to have a faster shutter speed when working with long focal lengths (yes, even with the moon being that far away).
Another example might be someone shooting a static subject with a very fast shutter speed and high ISO, when they could get a higher quality image with a slower shutter speed and lower ISO.
The point is, when you fully grasp the foundational principles of photography, everything becomes an intelligent, calculated decision, which means you’ll always get the exact image you want, at the highest possible quality.
Do not use fully automatic mode. Ideally, you should use Manual mode most of the time, although this is a point of contention among photographers, many of whom recommend Aperture Priority, or Manual with Auto ISO. Personally, I prefer straight Manual, because it works well for me and for my style of shooting, and I take issue with certain aspects of the other modes.
A fine art nature photo should be sharp, well-exposed, with proper depth of field, and exhibit intelligent control of motion, among other things. You cannot achieve all of this unless you fully understand, practice, and master your equipment and foundational photography concepts and techniques.
If you think your gear will take care of the settings and technical aspects for you, because it’s expensive or new, then you have the wrong mindset, and you will never truly succeed. It is quite possible to get terrible photos with $10,000 or more in gear. By the same token, a skilled photographer can get great images with inferior equipment. The images would not be the best quality, technically, but the point is that they can control the equipment, settings, and artistry to utilize the gear to its full potential.

7. Shoot often, and give it everything you’ve got
To become a master, you’ll need to do more than just research, planning, and buying equipment. You’ll need to actually shoot, in the field, under real conditions. And you’ll need to do it a lot. Obviously, the more often you are shooting in the field, the more you will improve your skills, knowledge, and experience.
Another benefit of spending a lot of time in the field is that you’ll experience a wider variety of conditions and subjects, giving you more opportunities for awesome images (and great memories). You’ll see more lighting scenarios, more weather patterns, more seasons, more wildlife variety, more interesting behaviors and interactions, more scenery, and many other things.
It’s not just enough to be in the field, though. You also need to give it everything you’ve got. If your only goal is to have fun and enjoy yourself, then you are probably not committed to obtaining highly artistic fine art images. For that, you need to put in 110% effort, physically and mentally, from planning, preparation, execution, and capture of the images.
To be physically and mentally comfortable should not be your goal – it should be to capture the desired image. Wake up at the right time, shoot in the right light, bring all of the right gear, go the distance needed, use proper field craft, physically do what is necessary to get the shot, don’t be afraid to get dirty, force yourself to have superhuman patience, and try things even when there is a good chance of failure. The more you give, the more you’ll get.

8. Develop your eye, and mind, for field shooting
There’s a lot to take in when shooting nature and wildlife photos, and things can happen quickly, so you will need to condition your “mind” and your “eye” to work for you in the field.
Know when to press the shutter button, and when not to press the shutter button. Just because the subject is in the frame doesn’t mean you should take the shot. Have a vision of the final image you want, and only press the shutter when it’s possible to capture it.
Light, backgrounds, subjects, scenes, specimens, poses, and more – there are good and bad ones of each. Learn to discern them, so you are putting your time and energy only into worthwhile opportunities.
Develop the skill of anticipation, and the art of gut instinct. You do this by understanding the subject, watching carefully, noticing distinctions, having experience, and computing everything you know, to intelligently guess where or when something might happen.
Train yourself until you automatically make strong compositions without thinking. With wildlife, you should select the AF point on the fly as you set up different compositions, based on where the subject is in the frame, and what direction it is facing. This should all happen quickly, and without much effort.
There are many more aspects of the field-oriented mind and eye, and they all come from research, practice, and experience.
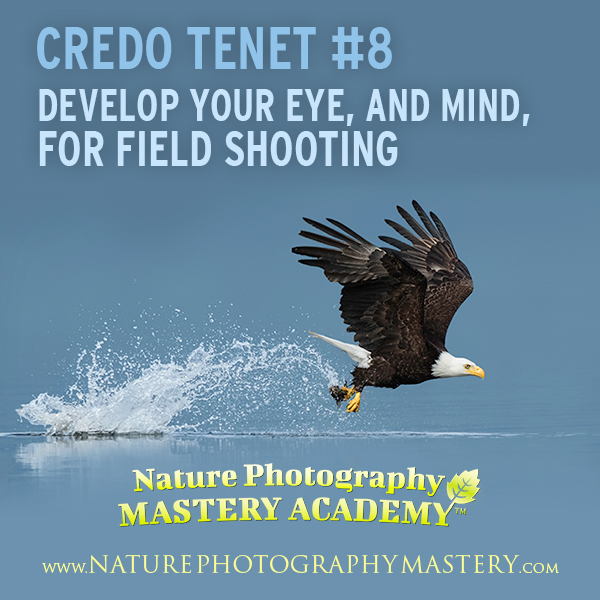
You need patience, anticipation, and an artistic vision
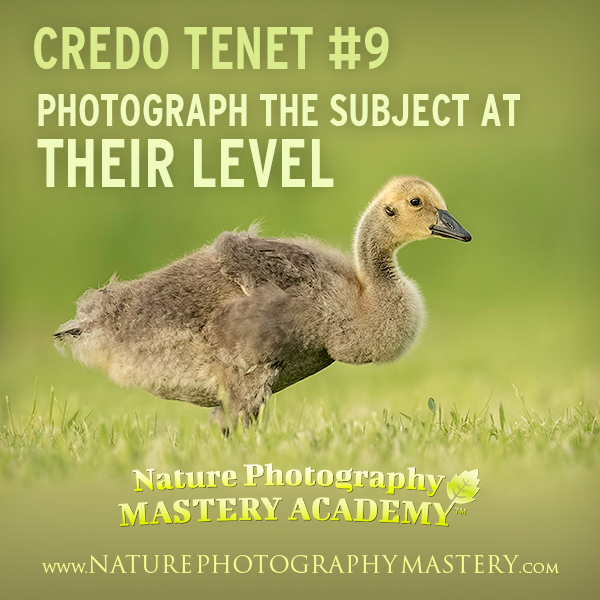
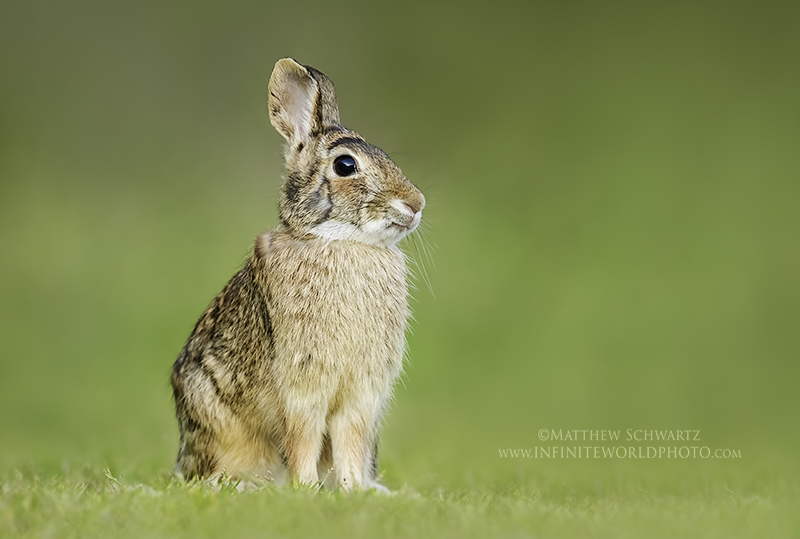
9. Photograph the subject at their level
Always try to get to the eye level of your wildlife subjects, especially for smaller creatures. Never photograph an animal while aiming up or down at it from another level.
Firstly, being on the subject’s level creates a much more intimate, engaging, and professional-looking image. The viewer feels as though they are in the subject’s habitat, right along with them, and there is an indescribable look and feel to the image that cannot be obtained from any other angle.
Secondly, being on the subject’s eye level creates a more artistic image, because the foreground and background will be more out of focus, due to the angle and depth of field. A sharp subject, shallow depth of field, and clean background are a winning combination, and a sure-fire way to produce a stunning image.
To get eye level photos of most small animals, you will usually be laying on the ground. You will often crawl toward the subject, or hide and wait for them to approach you. For other animals, you may just need to crouch down. Large animals, and ones at a higher level, can be photographed while standing up.
Not many photographers are serious enough to bother shooting at the eye level of their subjects. It’s likely that they don’t see what the benefit would be, or they are not willing to get dirty and be physically uncomfortable. However, the most serious photographers, who are committed to highly artistic, superb images, always go for the eye level shots.
There are two other advantages of shooting at eye level, particularly when lying on the ground. One is that you appear smaller and less threatening to the subject, allowing you to get closer to them, and to witness natural behavior. The other is that, by laying in the subject’s habitat, at their level, you will feel more emotionally connected to them, and have more fun photographing them.
Shooting down at the subject
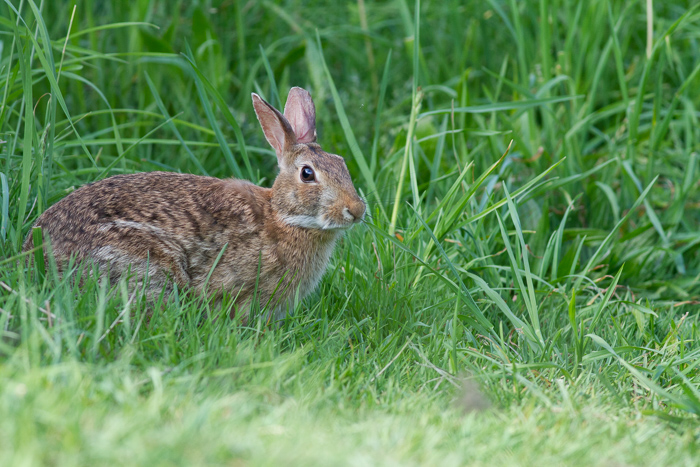
Subject’s eye level
10. Don’t shoot in harsh light
Avoid shooting photos in harsh, contrasty light, usually in the afternoon when the sun is high. This creates a visually displeasing image, with a lack of detail, and distracting shadows. This is not a set-in-stone rule, because some subjects can work in harsh light, particularly if you’re creating dramatic black and white images. But, in most cases, if the light is harsh, don’t waste your time.
Instead, shoot in the early morning and late evening “golden hours.” You can also shoot anytime during the day, even at midday, if there is cloud cover so the sunlight is diffused and soft.
Sometimes you’ll have to wake up very early, go to bed late, or make other adjustments to your schedule. It’s not easy, and you won’t always want to follow through, but your efforts will be rewarded greatly, with gorgeous light and stunning images.
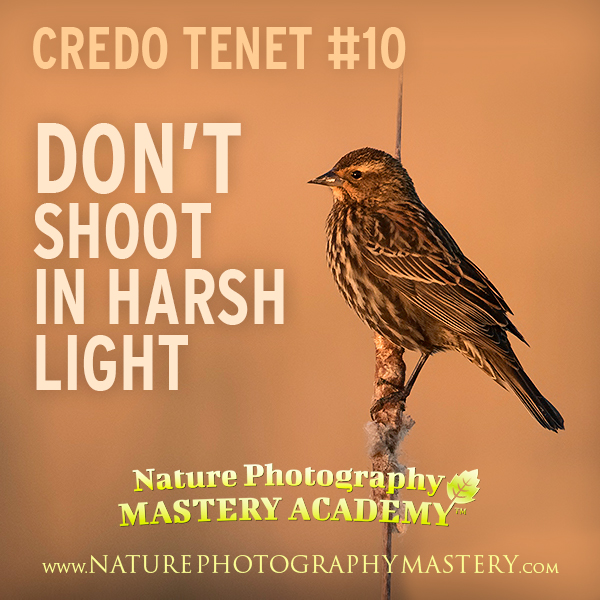
Soft and pleasing light
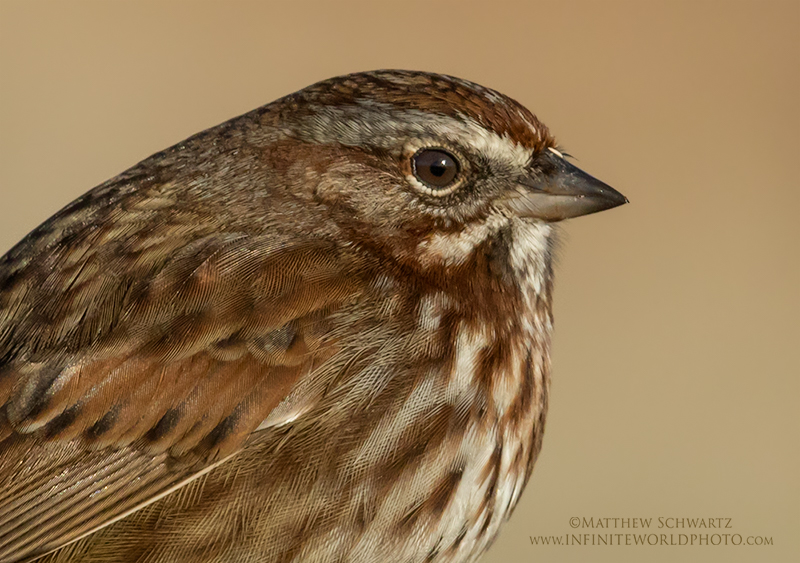
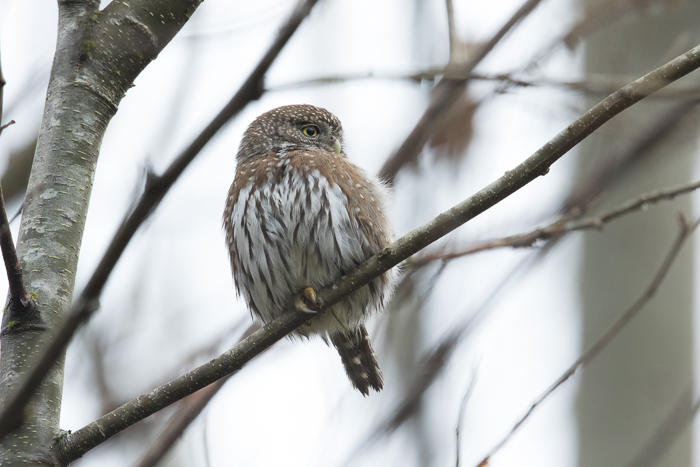
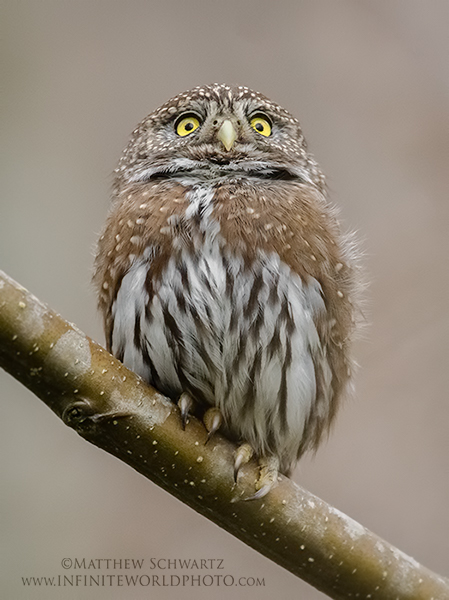
11. Judge an image by its background
One of the most important aspects of a fine art nature image is the background. Any distractions in the background will detract from the subject, as well as from the overall experience and flow of the piece. This includes, but isn’t limited to: shadows, highlights, twigs, stems, plants, rocks, lines, colors, spots, poor-quality bokeh, and prominent circles of confusion (incorrectly referred to as bokeh).
If you compare a photo of a subject that has a clean background, with a photo that is exactly the same, but has distractions in the background, it will be very apparent which image is more visually pleasing and artistic. So, you should not accept anything less than the best. Don’t present images with distractions, when you know it looks better without them.
Not everyone prefers the clean, artistic style of image; some people like more detail in their backgrounds, more indication of the environment. Even if you prefer some detail, you should still avoid excessively distracting elements or harsh lighting in the background – at some point, it moves from being environmental context, to just being a mess.
In my opinion, based specifically on my photographic style and preferences, an image could have perfect light, exposure, sharpness, composition, and all the other factors, but if the background is distracting, it’s a throwaway shot. Most photographers don’t have such stringent standards, however, there is one fact that remains: Distractions are distractions, and they will affect the viewer, regardless of the photographer’s opinion.
There is much to learn about getting clean backgrounds, if that is your goal. So many factors affect the background, such as aperture, focal length, optical quality, distance from camera to subject, distance from subject to background, shooting angle, lighting, and the list goes on. It’s best to practice, experiment, and get experience, so eventually you will be able to know right away if a scenario is going to render a good or bad background.
As a general rule of thumb, the following things will help you get a clean background: the subject being far from background (background becomes more out of focus), using a wide aperture (less depth of field), and using a longer focal length (narrower field of view, smaller piece of the background).
Distracting, messy background
Clean, artistic background
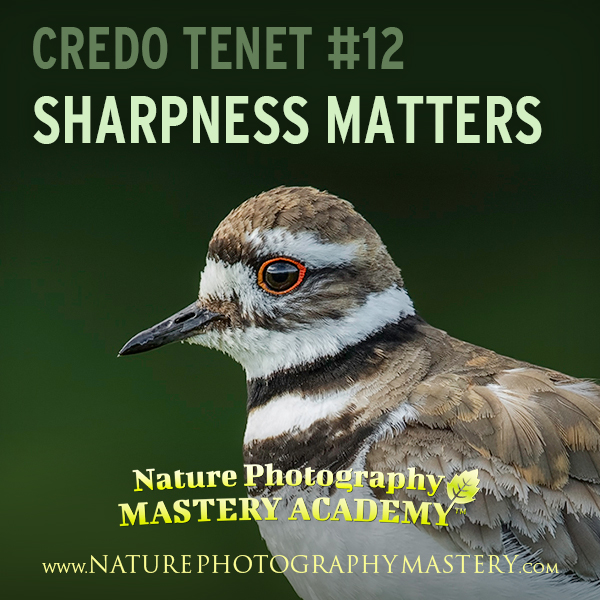
12. Sharpness matters
In most cases, you want the subject to be very sharp and crisp. This brings the visual focus of the viewer to the important areas of the image – the animal’s eyes, or the flower, or the mountain. Having a sharp image is a demonstration of knowledge, skill, and technical prowess. It shows that you care about the quality of your work, and that you understand how an out of focus or blurry image will affect the viewer.
That said, not all subjects and all situations call for a sharp image. For example, you may want to create an impressionistic image by capturing a blur of flowers blowing in the wind, or some other creative approach.
However, in many cases, even if some of the image is blurred, some of it should still be in focus. For example, if you want a silky-smooth waterfall image, the water will be blurred, but the rocks will still be sharp. Or if you want to show a bird in flight with wings blurred to emphasize motion, the head and eyes should still be in focus and sharp.
None of this is set in stone, and rules can be broken if you know what you’re doing, but it’s a very good guideline to follow most of the time.
A critically sharp image

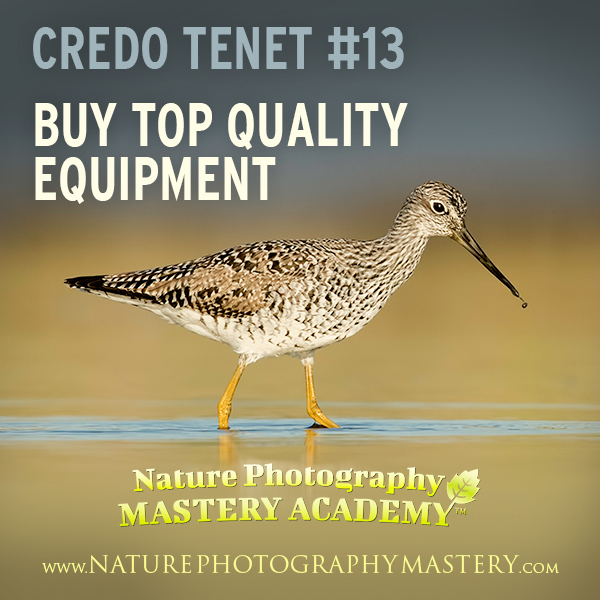
13. Buy top quality equipment
Some people will tell you that you don’t need to buy expensive gear to make good images. That is true, to some extent, if you are only trying to get “good” images. However, it doesn’t apply to high quality, superb, fine art photography, because we aren’t trying to capture “good” images, we are trying to create superb images.
We are shooting fast moving wildlife. We are in demanding conditions. We are dealing with technically challenging situations. We have have high standards regarding optical quality, sharpness, high performance autofocus, ease of use, sturdiness and ruggedness, full and complete control, fast response times for actions, buttons, shutter speed, and to have high quality images at 100% zoom in the digital file.
So, we are not talking about just making “good” images, we are talking about full control, performance, image quality, and features. For that, you need high quality, expensive equipment.
As a caveat, it is not necessary to buy expensive equipment right away. You should start with affordable gear. As you learn and grow your skills, your potential will eventually be held back by the technical limitations of your gear. At that point, you can purchase higher-end gear. The key is to save up your money as you are progressing, so when you are ready, you can get the next piece of equipment, utilize it to its full potential with your advancing skills, and take your images to the next level.
That said, you must never deceive yourself into thinking that nice gear will get you better photos, unless you have the knowledge, skill, and technique to utilize that gear properly, as a tool to obtain the results you desire.
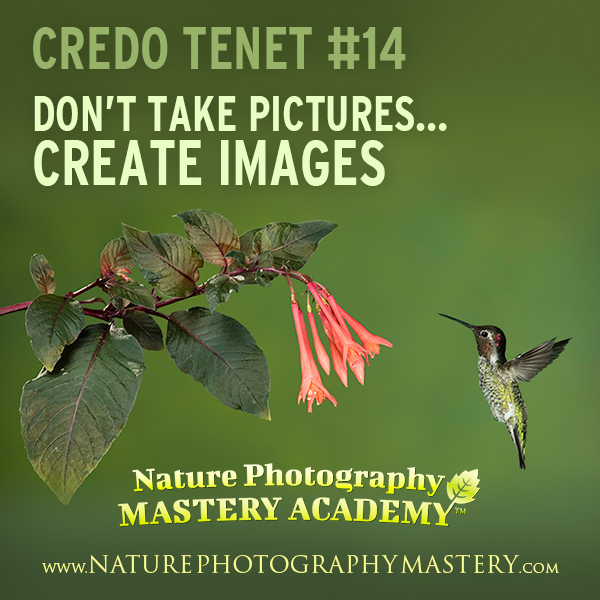
14. Don’t take pictures…create images
One approach to nature photography is to go out shooting willy nilly. Another approach is to do project-based shooting, which means that you have very specific goals, disciplined preparation, and a detailed plan. Nothing is left to chance, except those things which you cannot possibly control. The idea is that you are proactively bringing a concept to fruition – “creating an image” – as opposed to passively going out and hoping for something – “taking pictures.”
Project-based shooting is powerful because it:
- Gets you to research and learn a lot of things
- Helps you hone your skills, knowledge, and techniques
- Gives you more control, through planning and preparation
- Allows you to focus on one thing, so you make dramatic progress
- Is fun, because you work on something that you are excited about
- Develops your abilities, so you can achieve bigger and better things
- Ensures you’ll get superb images more often than by shooting willy nilly
Here is a summarized overview of a project-based framework
- Have a specific image in mind, of a specific subject
- Set that image as a clear goal
- Do the necessary research
- Create a detailed plan
- Prepare yourself, your equipment, and whatever else is needed
- Follow the steps of your plan
- If you don’t achieve the image, take notes about what you learned
- Apply what you learned, to further preparation and planning
- When ready, try for the image again, using your new plan and knowledge
- Repeat the previous three steps until you succeed at achieving your goal
- Set another goal and repeat the process
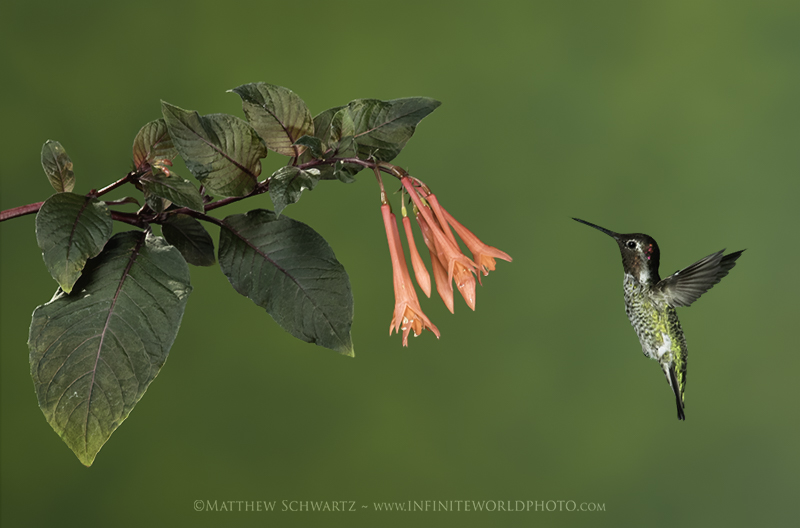
A carefully planned and created image
15. Develop patience and perseverance
Fine art nature photography is not always easy, and it’s not always fun and games. Shooting photos in the field is only a small part of the process; you’ll also need to spend a lot of time on research, learning, planning, practicing, and preparing. Everything is tied together, and the more time and effort you spend on preparation, the more you will enjoy your time in the field, and the resulting images.
There will also be a lot of time in the field, waiting for wildlife, waiting for light and weather, enduring uncomfortable conditions, carrying heavy equipment, and testing your physical and mental capacities. It’s a good idea to develop a tolerance and positive attitude toward these things, to improve your patience, and make these challenges more enjoyable.
Despite all of your time, planning, money, effort, and energy, there will be days on which you get no usable shots, and things don’t work out how you’d hoped. There will be close calls, where you nearly achieved a goal, only to have your hopes dashed. There will be times when you give everything you have, and come up with nothing. You will need to challenge yourself, push yourself, and never give up. You must persevere in the face of challenge.
It’s about having very high standards, knowing what you want to achieve, and not settling for anything less. It’s also an understanding and acceptance that what you’re doing is not easy, but if it was, it wouldn’t be as rewarding when you succeed.

It took many hours to capture this image
16. Get comfortable with being uncomfortable
In your pursuit of superb, artistic images, you will often have to endure things which make you uncomfortable, both physically and mentally. For example, you’ll need to get up early, carry heavy equipment, be in physically demanding situations, crawl on the ground for low angle wildlife shots, get dirty, endure weather, bugs, long periods of time being patient, and much more.
If you are the type of person that tries to avoid discomfort, you are doing yourself a disservice. Do you want to be comfortable, take it easy, and get average photos, or do you want to be physically active, give 110%, and get outstanding images? It’s up to you, but realize that you will need to accept whatever results you get based on your decision.
It’s important to note that there is a huge difference between “comfort” and “safety.” We are talking about mental and physical challenges and discomfort; we are not talking about being foolish and putting yourself in serious danger. Always do your research, have the proper equipment, and proceed with caution. You are responsible for your own safety.
Aside from the fact that enduring discomfort can be the difference between getting a snapshot, and getting a masterpiece, there is also the effect of increased self-esteem and confidence that comes from pushing yourself. There is something to be said for facing challenges, expanding your boundaries, and keeping your commitments with yourself.
I wore waders and crawled in rotting mud for this image
17. Take care of your health
Important Disclaimer: The generalized information I am providing in this credo tenet is based on my own opinion and experience. I am not giving personalized advice to you, and I assume no responsibility for anything negative that happens as a result of you acting on this information. Exercise, weightlifting, and meal plans all have significant risks if done improperly. Always talk to your doctor before starting any exercise routine or change in diet, and work with relevant professionals who can properly inform and train you regarding these things.
First, let me be clear that I am not passing personal judgments on anyone. Health is a very personal topic, and I understand that. That said, this principle is included in the credo because it is practical, in regard to extreme nature photography. That is, where one is serious, committed, focused on mastery, and striving to create amazing images.
For extreme and serious nature photography, you should be in good shape, physically. I am talking about giving 110%, going for the very best artistic shots, and doing whatever it takes. You are facing physical challenges, and you are owning them.
Let’s talk about equipment weight, and physical demands. Take a gallon jug of water and try holding it at arm’s length for a while. Hold it up as if it were a camera and lens. Carry it around for a bit. That gallon of water weighs a little over 8 pounds. A camera and telephoto lens can weigh 11 pounds or more. Don’t forget the tripod and gimbal that weigh another 10 pounds. Oh, and there is also your backpack, with food, water, supplies, and accessories, weighing around 10 pounds for a day trip. Macro equipment isn’t much lighter, considering things like a sturdy tripod, ballhead, macro rail, light modifying accessories, flash, and other equipment.
We’ve only considered the weight of the equipment. Don’t forget that you need to carry it across terrain, through nature, in varying weather, sometimes while wearing heavy clothing, and you’ll be physically exerting yourself by using the equipment and doing what’s necessary to capture the images, possibly for many hours. Crawling on the ground toward a wildlife subject is no easy task, especially with a large lens. Neither is hand holding that rig when the action picks up, and your tripod becomes too limiting. Walking isn’t so easy when wearing waders or boots, and traversing mud and water. Hiking around in the wilderness to reach your subject isn’t a cakewalk either. Sometimes that wildlife subject, flower, or whatever it is that you desire, seems to be tucked away or hiding in the most difficult-to-reach spot.
The solution to all of this is to do physical exercise, and eat healthy. After a few months of proper weightlifting, some cardio, and a proper diet, you’ll notice that your photography gear feels lighter. You’ll be able to hand hold your lens for longer periods, walk farther distances with less fatigue, be more adept, have better mental clarity, and overall just feel much better. You’ll enjoy yourself more. And when you realize this, you will be more motivated to continue working out, and increasingly enjoy the benefits.
It’s important to note that about 20% of your health comes from exercise, but 80% of your health comes down to how and what you eat. Unhealthy eating will reduce your energy, strength, mental capacity, and probably your overall lifespan. It will also inhibit your muscle growth while working out. You need the proper types of foods, amounts of foods, and frequency of foods, in order to reach optimal physical health. If you eat nourishing, natural foods, protein, fruits, vegetables, and minimal processed foods and sugary foods, you will feel better, be stronger, and think clearer. Sufficient hydration with plain water is also critical.
The downsides of exercise and healthy eating are that they are time consuming, expensive, and may cause more harm than good if done improperly. Working out and eating healthy is not easy, but the decision is simple: Do it, and you’ll reap the benefits. Don’t do it, and you’ll pay the price.
Note: If you didn’t read the disclaimer above, please do so now.
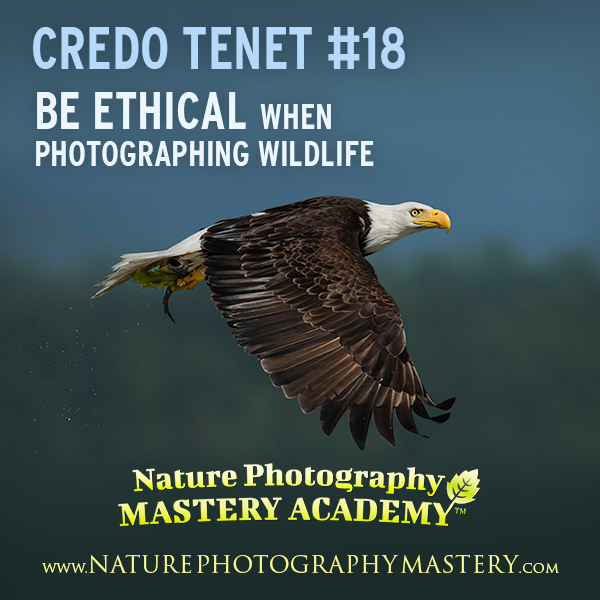
18. Be ethical when photographing wildlife
I believe that the most important aspect of wildlife photography is to have a high level of respect for the subject, and to show genuine care and concern for it. You must not do anything to induce too much stress on an animal.
There are a lot of things you can do to ensure the wellbeing of your subject:
Have knowledge about general animal psychology and behavior. Research and understand the species you are photographing. Be perceptive, and pay attention to the animal’s body language and behavior. Abort the mission if they are too stressed out or you’re causing harm. Take extra care in sensitive situations, such as during breeding season, while young are being reared, or when predators are obviously nearby.
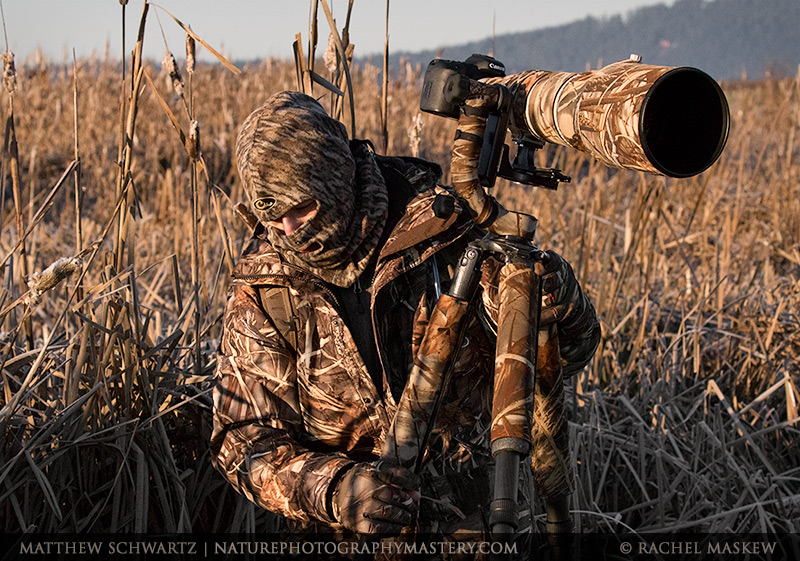
Research and learn about fieldcraft, then actually use it. Fieldcraft is skills and techniques for operating stealthily in the field. In wildlife photography, it typically has to do with the methods by which you approach, or get close to, the subject. Practice and improve your fieldcraft, so that you can get close, while minimizing the subject’s stress. Although there is much to learn, some key fieldcraft tips are:
- Stay low to appear smaller and less menacing
- For smaller animals, crawl on the ground
- Approach from angles, instead of directly
- Don’t make direct eye contact
- Move very slowly, and don’t make sudden movements
- Make gradual approaches. Move, wait a while for the animal to adjust to you, move a little more, let it adjust again, then move some more. Take as long as needed for the animal to become comfortable with your presence.
In some cases, if you’re photographing wildlife that is not accustomed to people, it can be useful to wear camouflage, or utilize other ways to conceal yourself. This will put less stress on the animals, let you get closer, and result in more natural behavior. Even though it isn’t always needed, it’s important to understand that camo can be useful in some situations, and has its place in a serious wildlife photographer’s kit.
Avoid shooting with, or being around, unethical photographers. If you witness serious harassment or harm of an animal, you should call local authorities and report the behavior.
Camo reduces stress on wildlife subjects
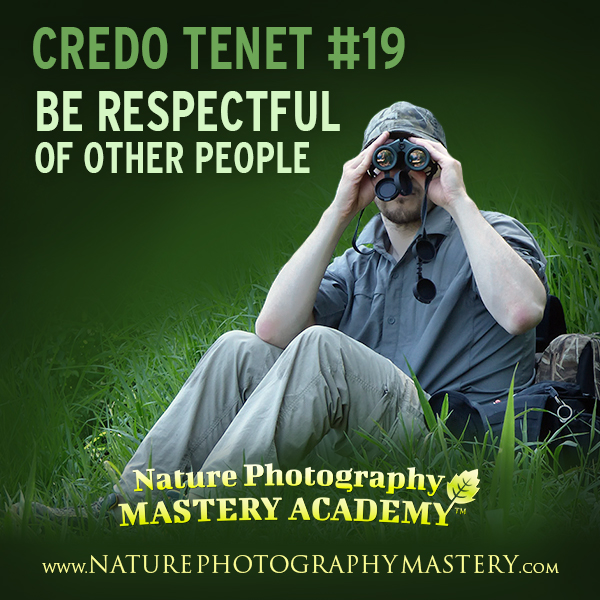
19. Be respectful of other people
The following suggestions apply to other photographers, birders, wildlife viewers, and people just trying to enjoy nature.
If someone is working a wildlife subject, and there is any possibility that your approach could disturb the subject, stay back, even if this means you might miss the shot this time. Sometimes a photographer may have spent many hours, and much effort, getting into the position they are in with a subject, and all it takes is one wrong move by you to ruin the whole thing. Remember, an animal’s stress increases as the number of people in an area increases, and as the amount of escape points decreases.
If someone is busy observing or photographing, don’t distract them. Keep your voice down. Move far away if you need to use your cell phone, or do anything that could be annoying or disturbing. If a photographer is wearing camo, lying on the ground, or otherwise trying to be concealed, do not approach or try to join them
As much possible, try not to interfere with other photographers or wildlife watchers. Try not to walk in front of their lenses or other optics, crowd their space, or otherwise be obnoxious. If something might bother them, try to communicate what you will do and why. Make gestures, or ask questions such as, “Do you mind if I sneak by you real quick”, or “Are you taking a photo at this instant? I need to pass in front of you for 5 seconds” or “Mind if I join you?” or “Is there a subject here that I might scare away if I approach?”
There will be times when other photographers, and other people, will behave with ignorance and disrespect. They may not know any better, or they may not care. Just do your best to remain calm, and handle the situation in a professional manner. Sometimes, if you think someone is not aware that they are doing wrong, you can politely and gently inform them. If things get ugly, you may want to leave the area to avoid escalating the situation.
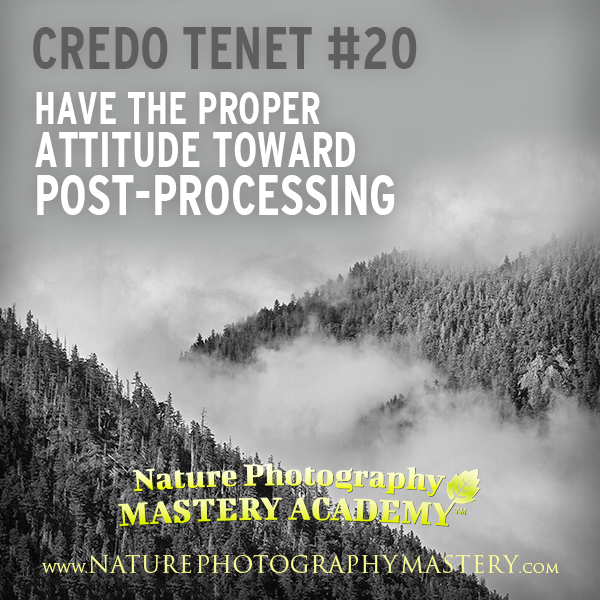
20. Have the proper attitude toward post-processing
Look at editing programs as just another tool in your kit, which allows you to create a high quality finished image, and helps you fulfill your vision as an artist.
Understand that post-processing is important, because of the way digital cameras work. Especially when shooting RAW (which you should always be doing), the image is usually flat, soft, and has the wrong colors and white balance. You’ll need to make corrections for those issues by adjusting curves, white balance, colors, sharpening, and so forth. Editing is a necessary and normal part of the process of digital photography.
Slash negative beliefs such as that editing is complicated, boring, or takes too much time. Editing should be viewed as an exciting, and essential, part of the entire process of creating a piece of art; a time when your creativity and skill bring your vision to fruition, and allow you to share it with others. It is also an opportunity for you to learn and improve, and once you get past the initial challenges of learning the basics, it gets much easier.
Don’t fall prey to the stigma of popular terms such as “Photoshopping,” which has a negative connotation around images being over-doctored or garish. Editing programs such as Photoshop can be used to whatever degree or style that you prefer. You can show great restraint, or go all out and create an artistic image. You have the freedom of choice, and can draw the line wherever you feel comfortable.
One critical point about Photoshop, that I want to stress, is that you should not think of it as a way to fix images. This is not a rescue mission. In most cases, if an image needs too much fixing, you should trash it and go capture something better. These days, there is too much emphasis on post-processing, and not enough on mastering your technicals and artistry. Don’t think that you can take a lackluster photo and make it into something awesome with the magic of Photoshop.
Always do your absolute best, in planning, and execution in the field, to capture the best possible RAW image. This includes not only the technical aspects of exposure, sharpness, and so forth, but also the artistic elements such as lighting, clean background, no distractions, and so on. Think of Photoshop as a tool to polish an already excellent image into something incredible.
Learn a lot about post-processing, and work to improve at it. Make sure you have the correct equipment, monitors, calibration, and software, because that is what prepares your image for final viewing and output. If you have amazing photos, but you have poor post-processing, you are effectively throwing away all of your hard work, time, and expensive equipment.
Now you know what Nature Photography Mastery Academy stands for.
If you think you’re extreme enough to live the credo…if you want to push yourself mentally and physically to achieve your highest potential…if you’re stuck at average and want to move to excellence, start your mastery journey today.
If the credo principles are too extreme for you or aren’t a good fit, not a problem! Thanks anyway, for taking the time to check it out. I wish you well as you follow your own chosen path.
Sincerely,
Matthew Schwartz